Have questions? This way.
Guides, FAQs, and quick fixes.
Can't find your answer here, contact us.
Guides on "How to..." do the following:
1. Visit DDF Member Settings Page
2. Click "Data Feeds"
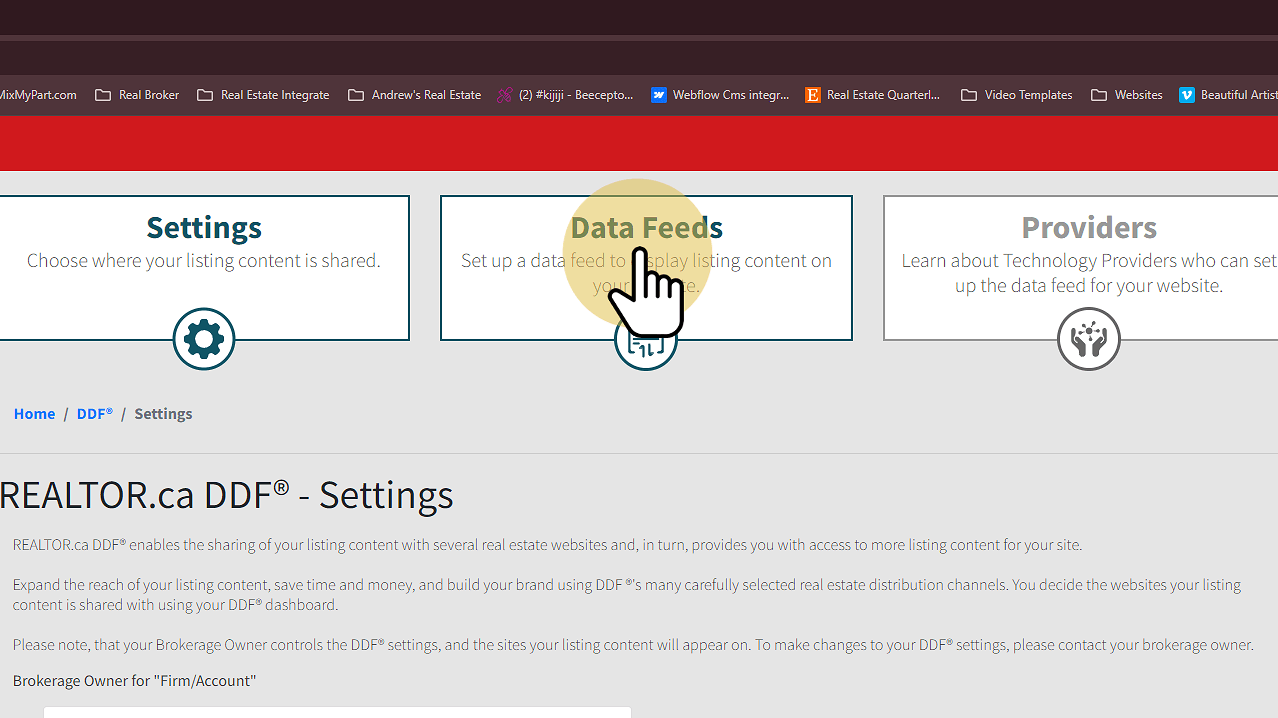
3. Click "One or More Offices"
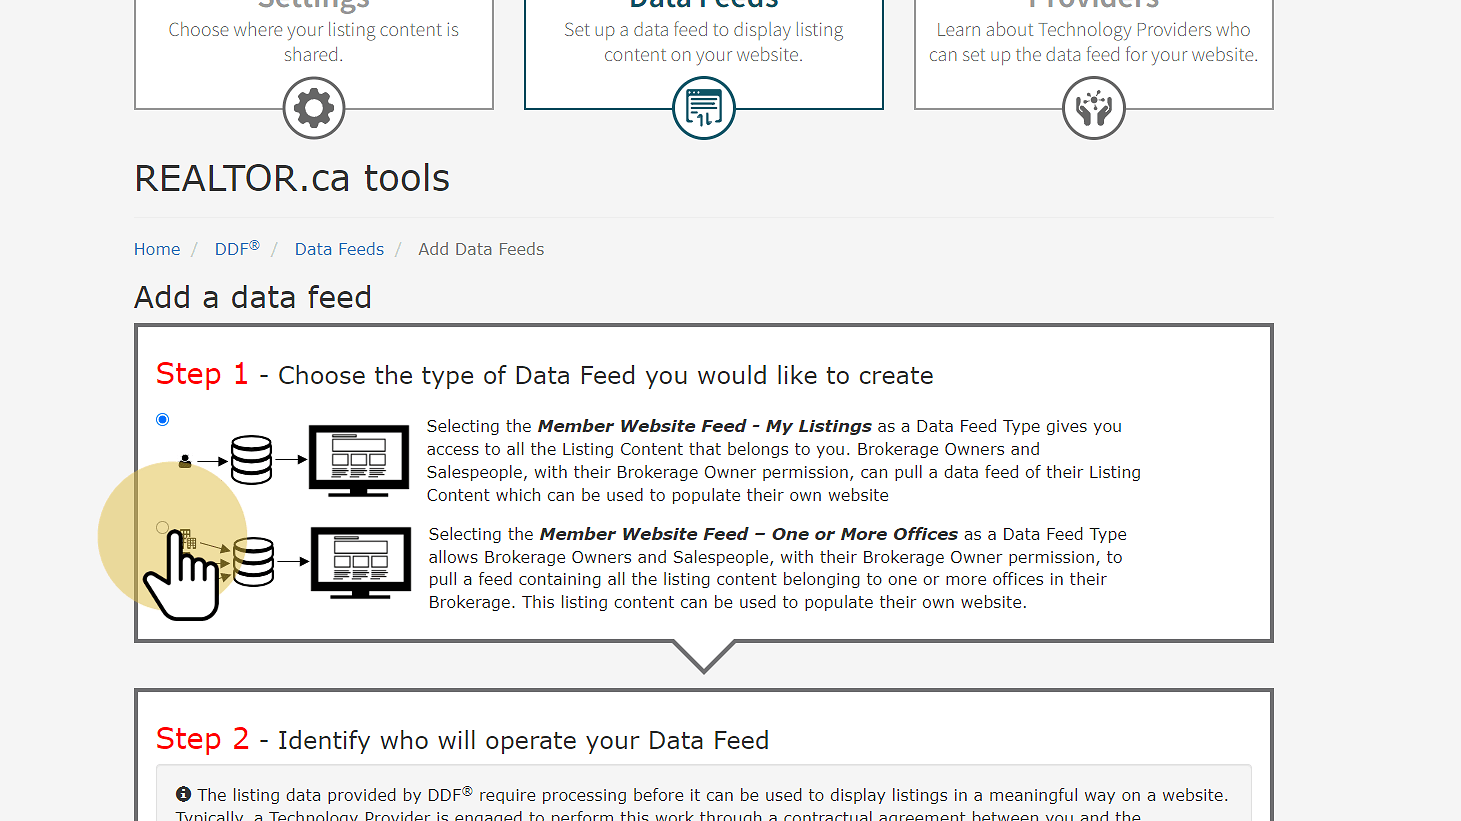
4. Choose "All Offices" or "Select Below"
You may have access to more than one brokerage office to include in your DDF feed. Choosing "All Offices" will include all the available offices' listings in your data feed. Choosing "Select Below" will allow you to choose which offices specifically should be included in your data feed.
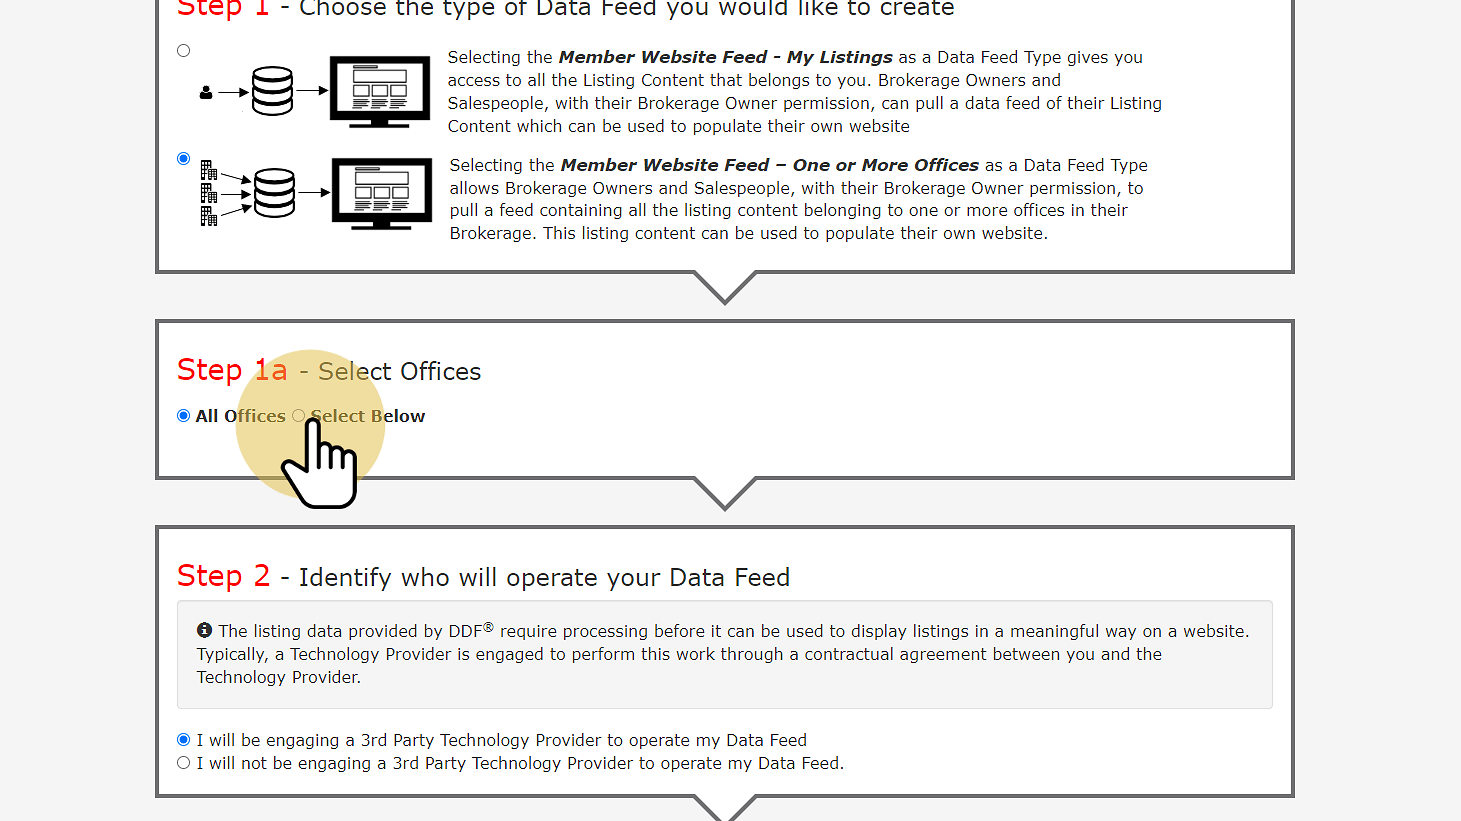
5. Select which office(s) listings to include
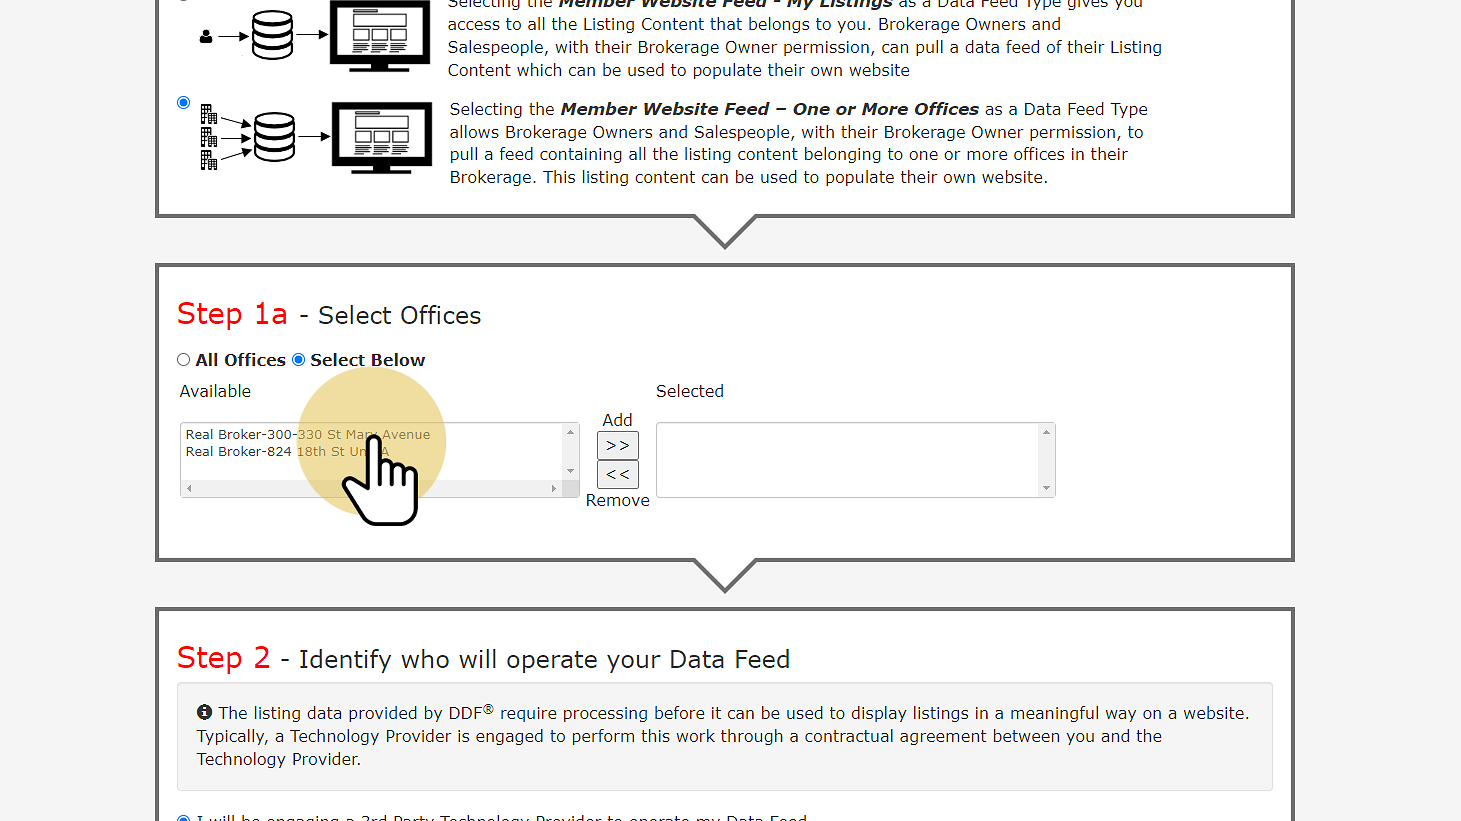
6. Click ">>" to add the selected office
Once selected, you must click the >> button to add the selected office to your active list. Repeat as necessary to add other offices you wish to include in your data feed. You can also use the << to remove an office from the offices on the right which you've already added if you wish to remove them from your data feed later.
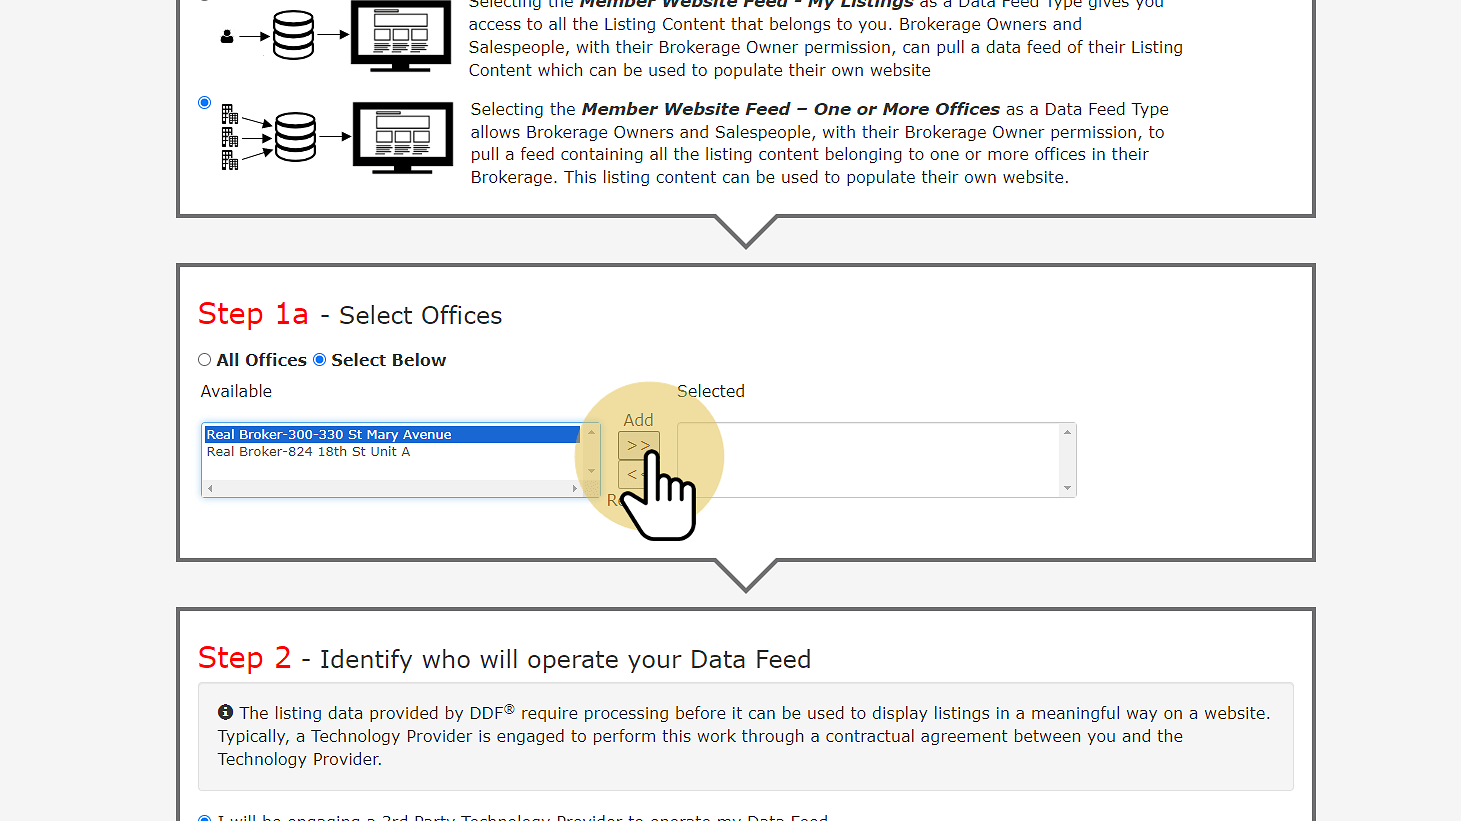
7. Click "I will be engaging a 3rd Party Technology Provider..."
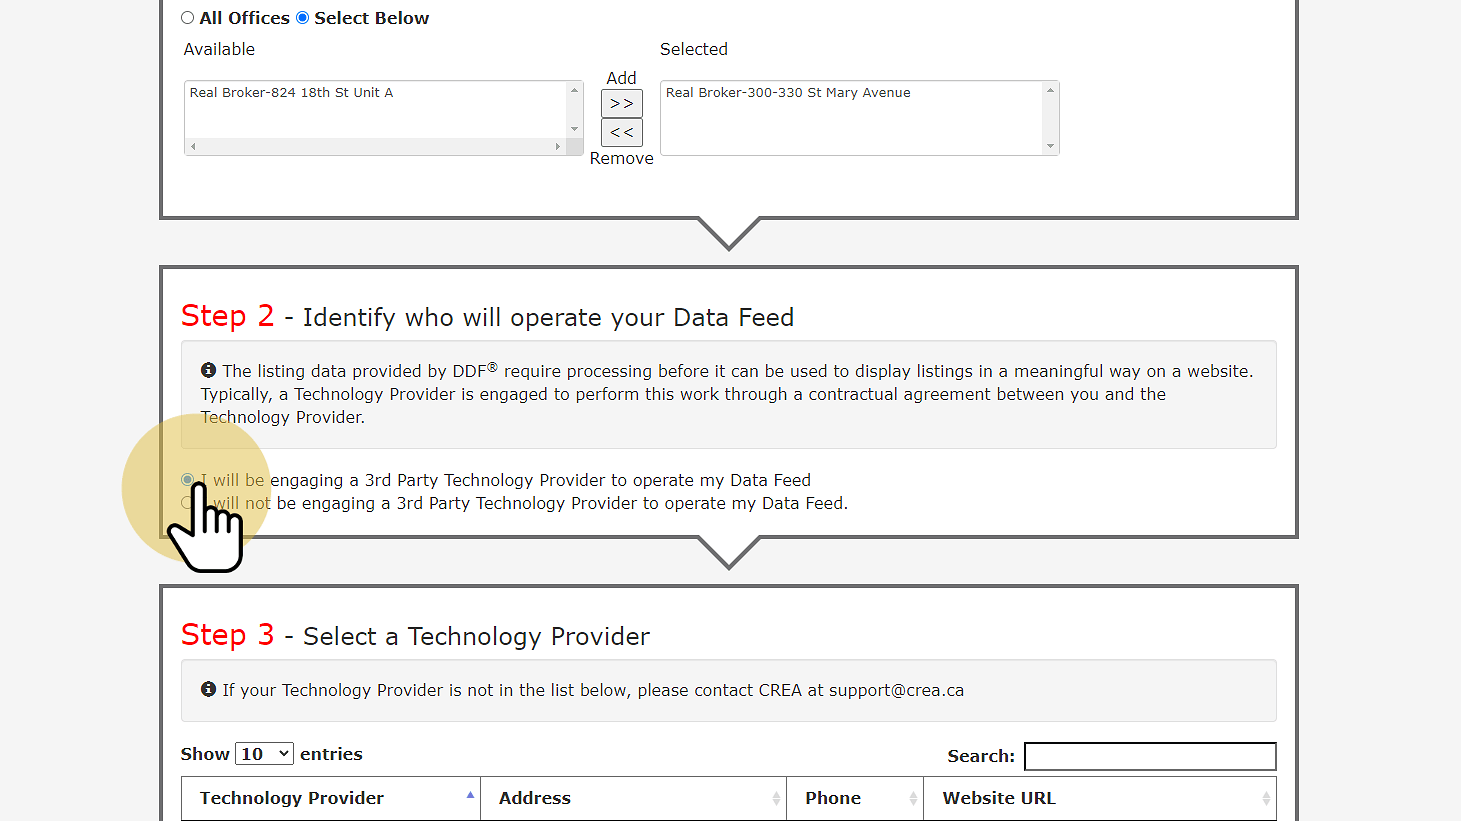
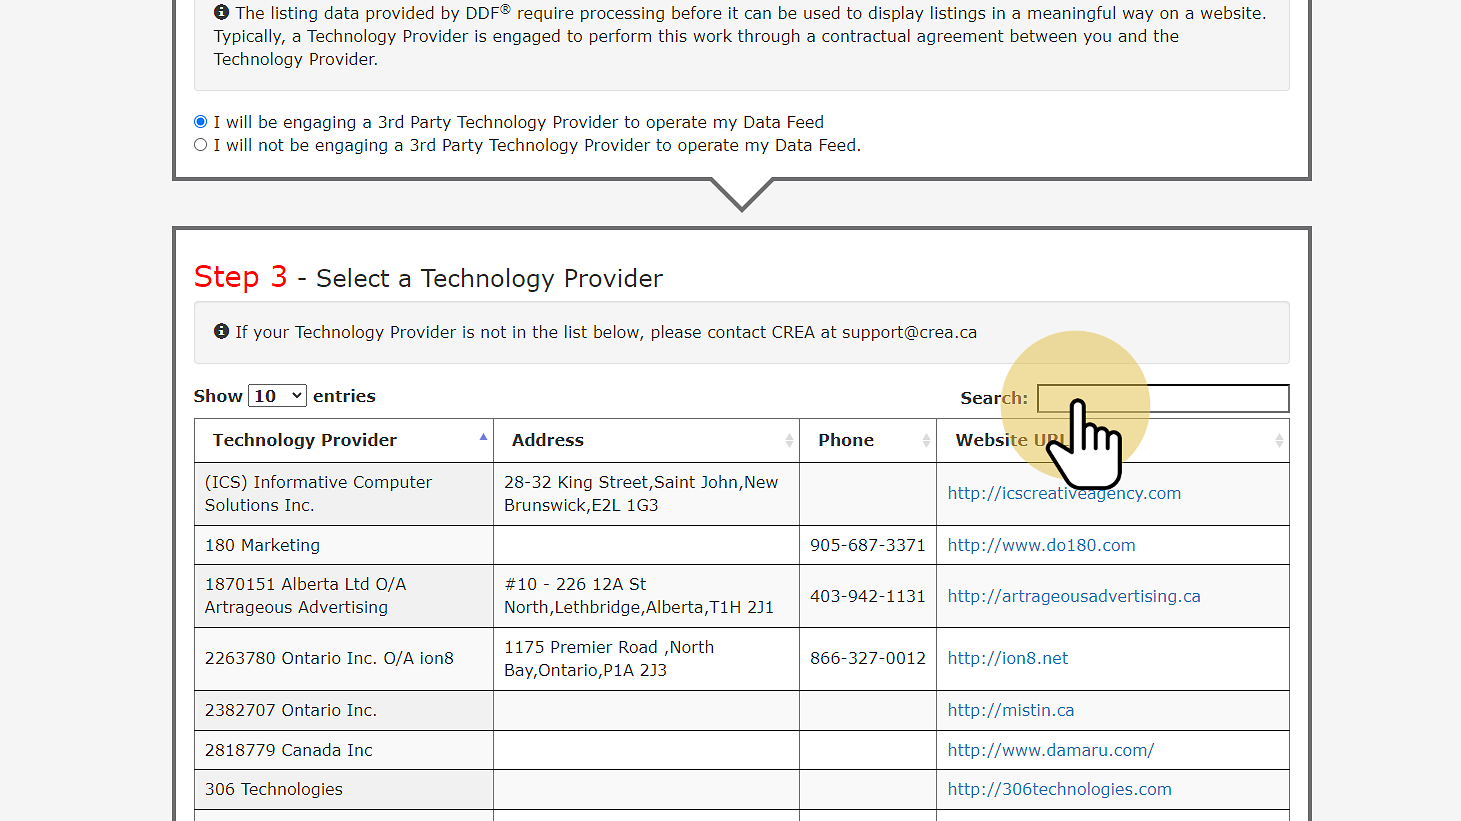
8. Click "Search" and enter "Real Estate Integrate"
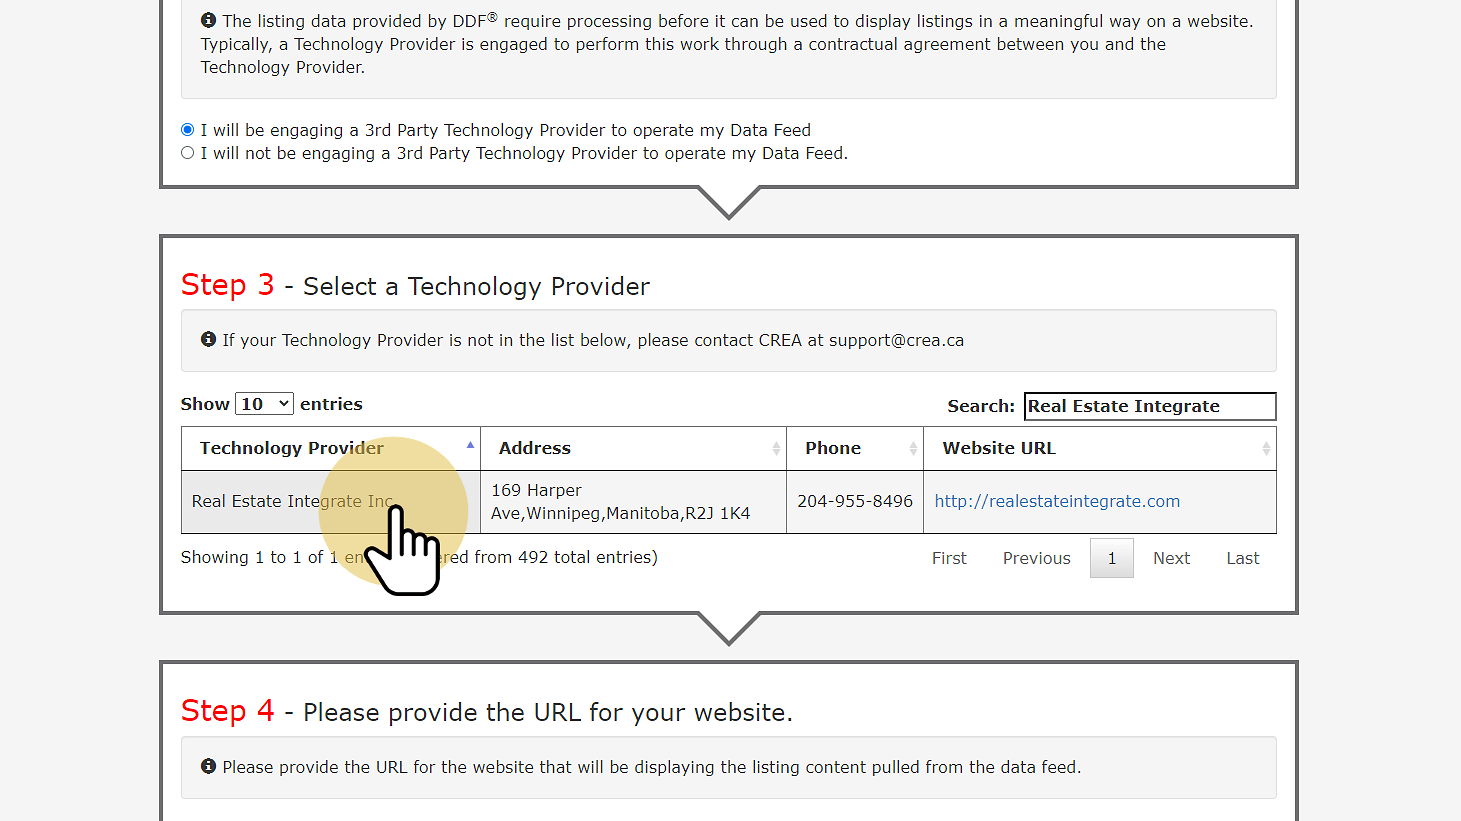
9. Click "Real Estate Integrate Inc."
This is an easy step to miss, but you must actually click on "Real Estate Integrate Inc." and the row will turn a slightly darker grey colour. This means you've successfully selected your Technology Provider.
10. Click "Website URL"
If you have a website already or intend to build one in the near future, you should enter your custom domain name (website URL) here. If you don't have a custom domain name you can enter "https://realestateintegrate.com".
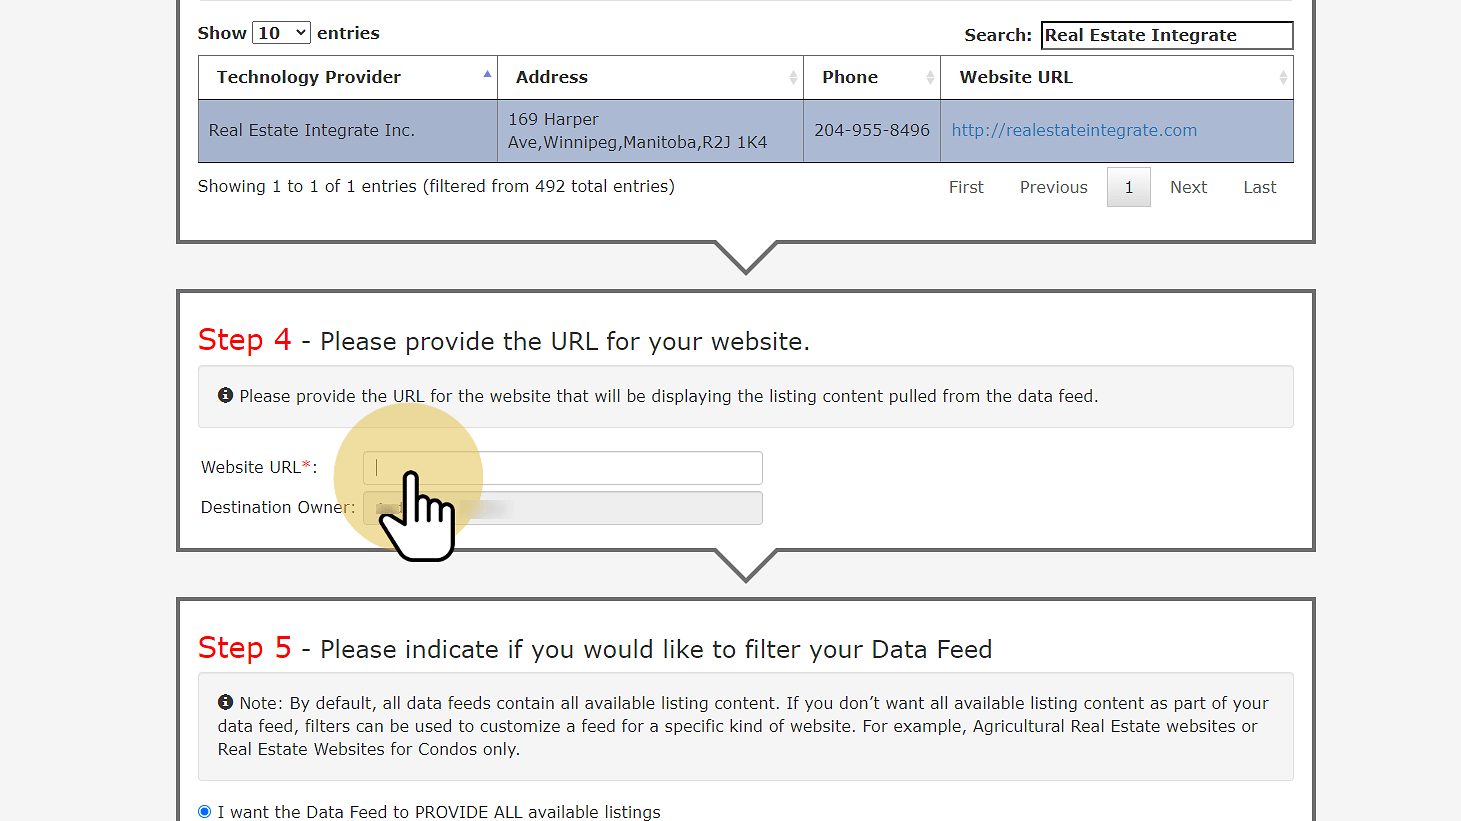
11. Click "I want the Data Feed to PROVIDE ALL available listings"
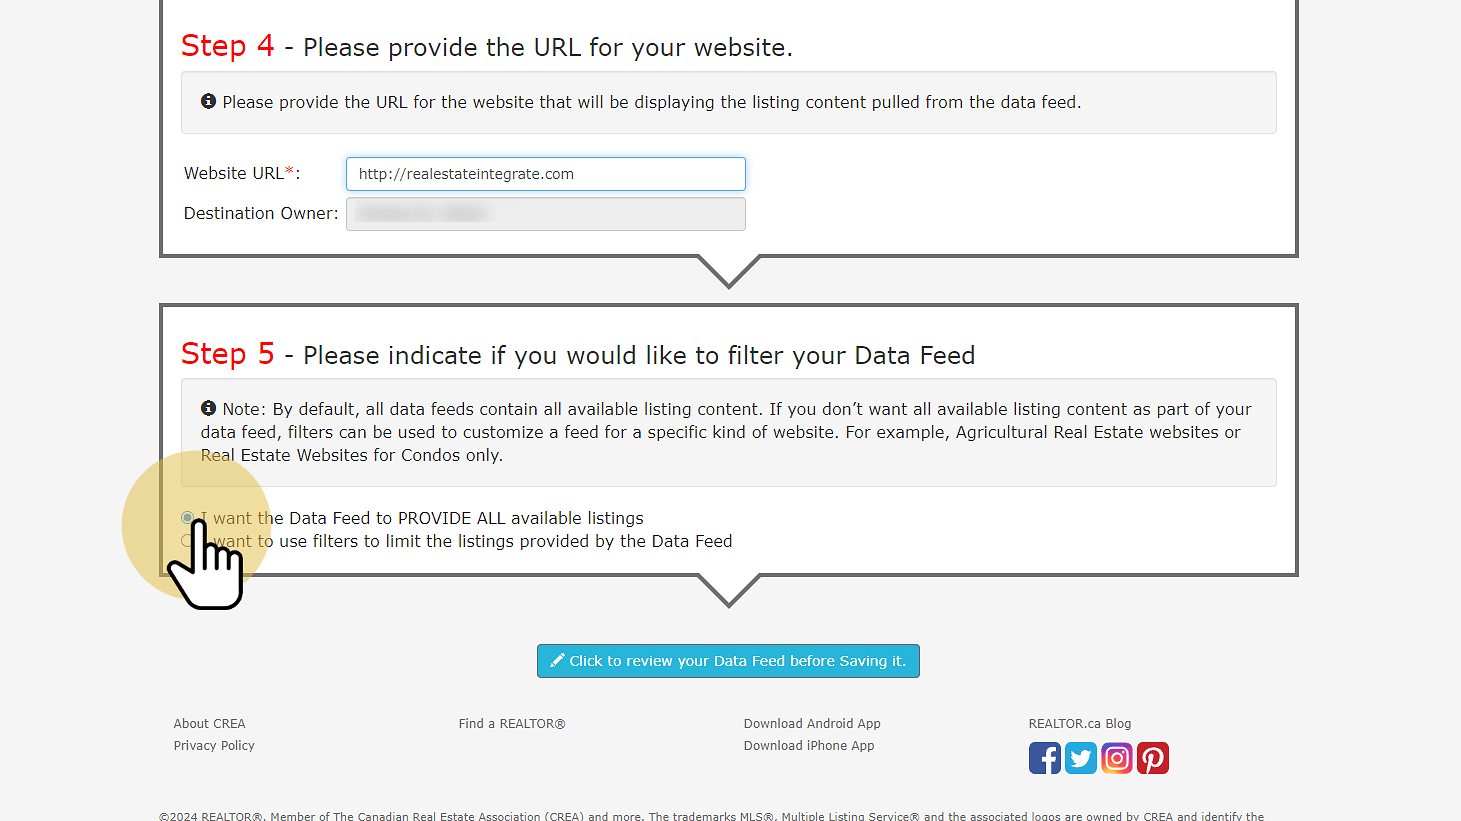
12. Click to review your Data Feed
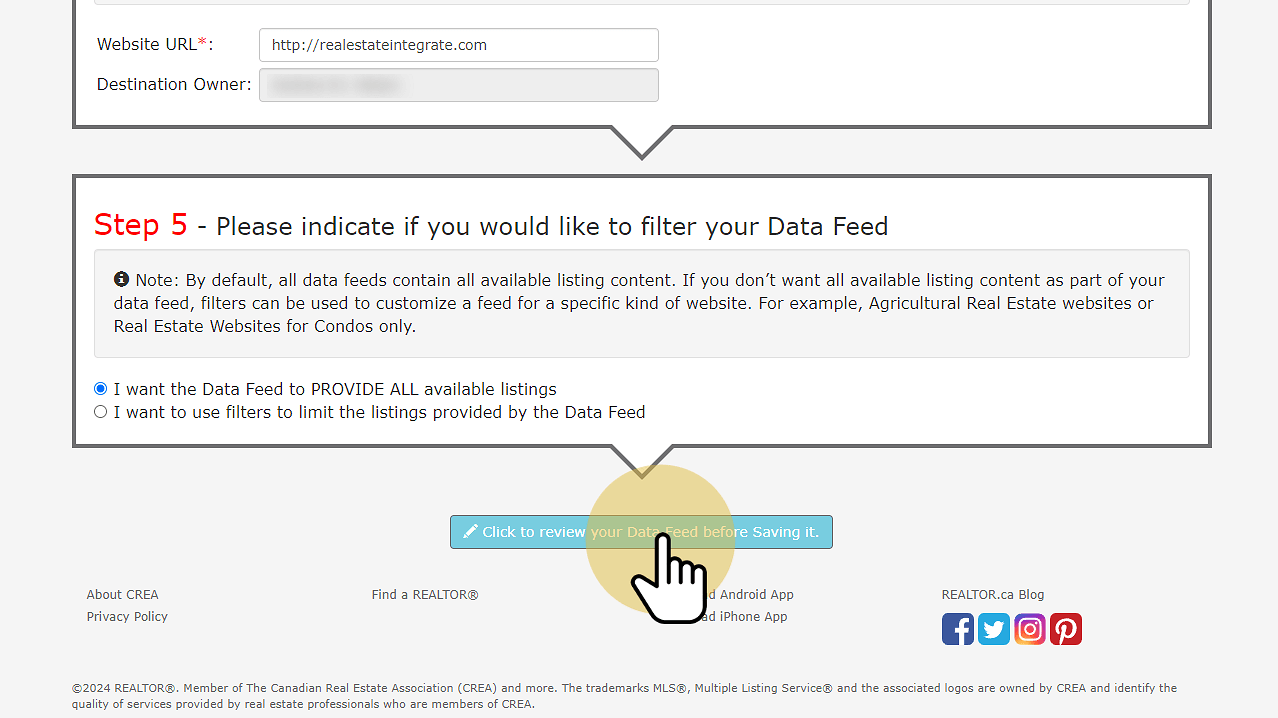
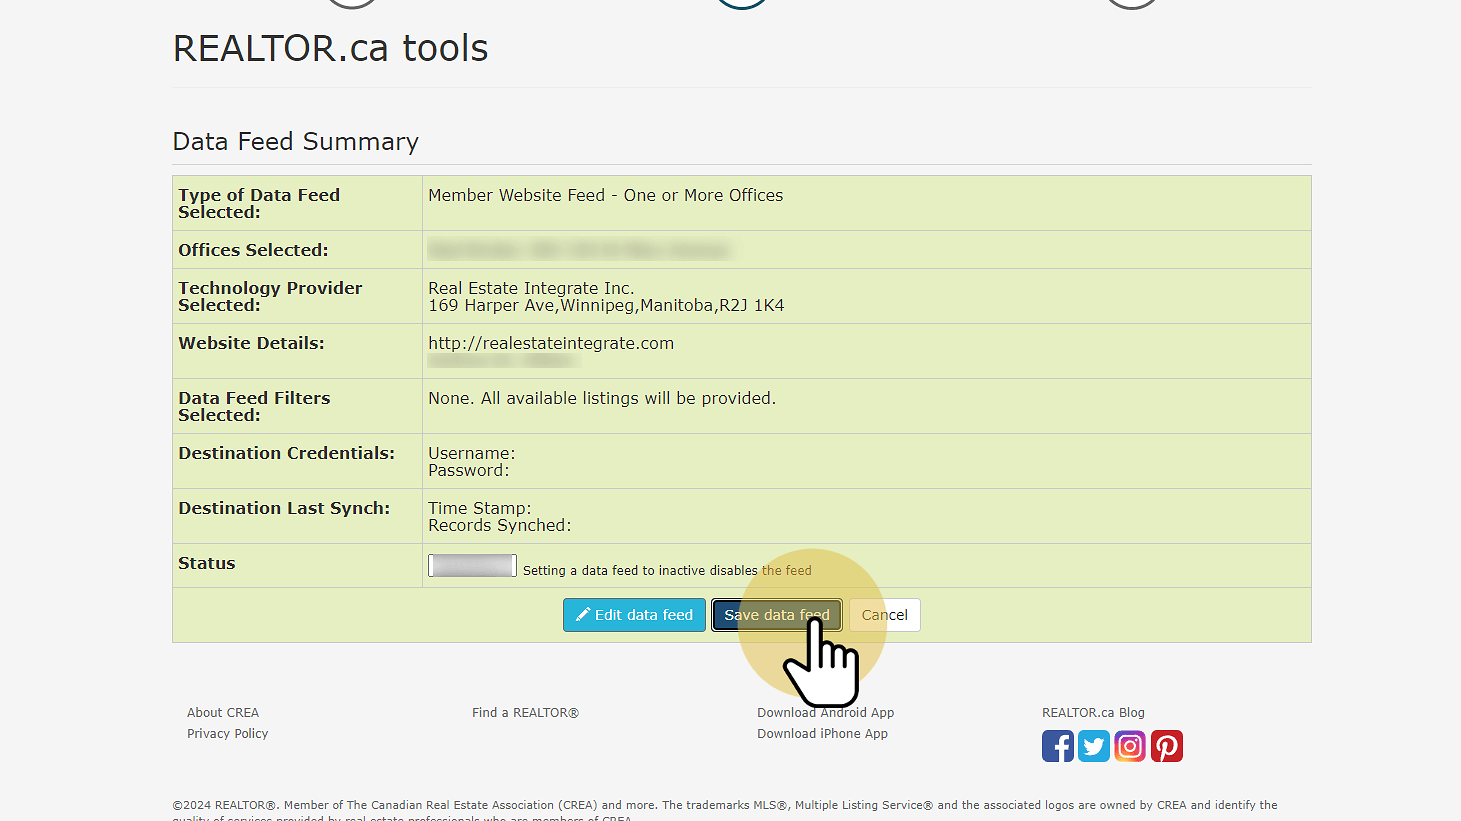
13. Click "Save data feed"
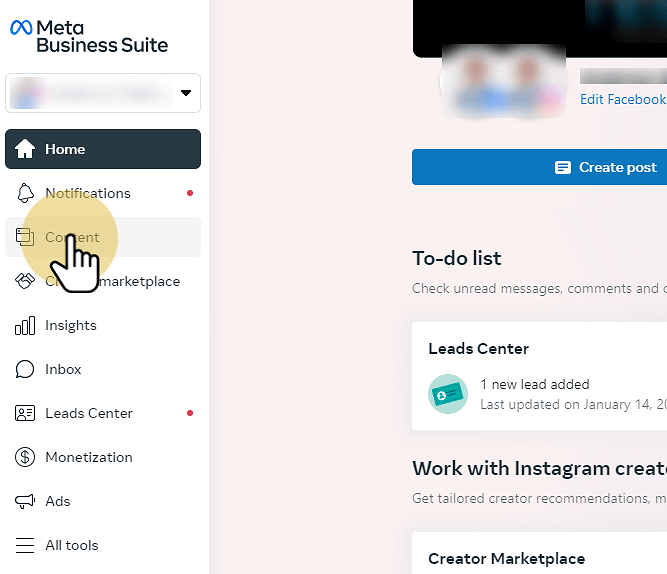
1. Visit Meta Business Suite
2. Click "Content"
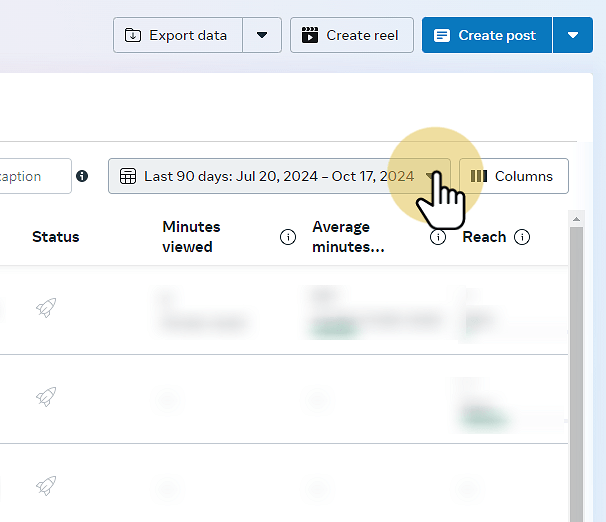
3. Click the dropdown for date range
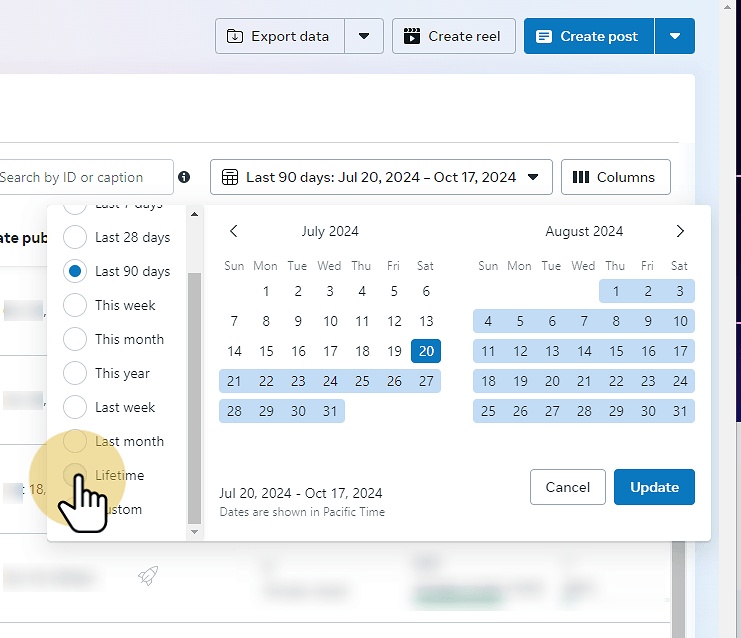
4. Choose "Lifetime"
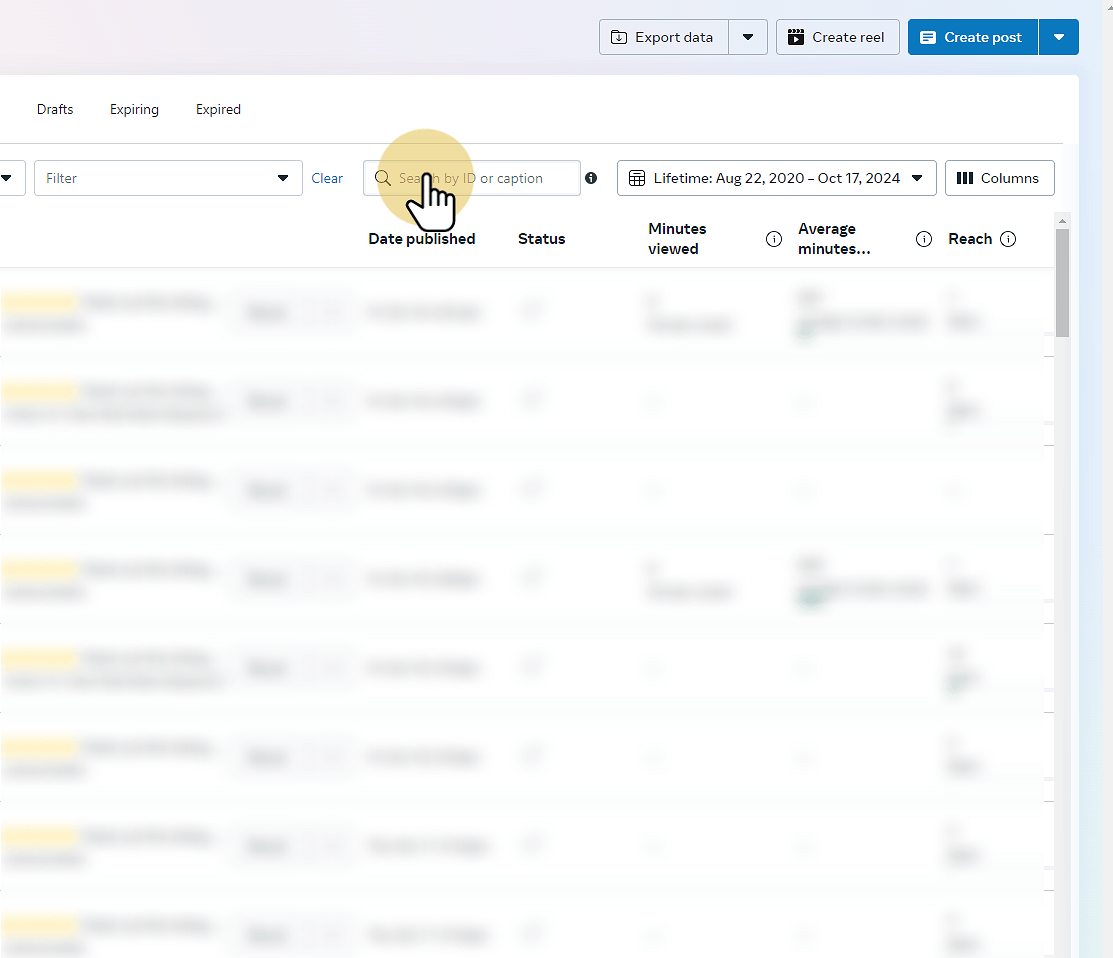
5. Click "Search" & enter property address
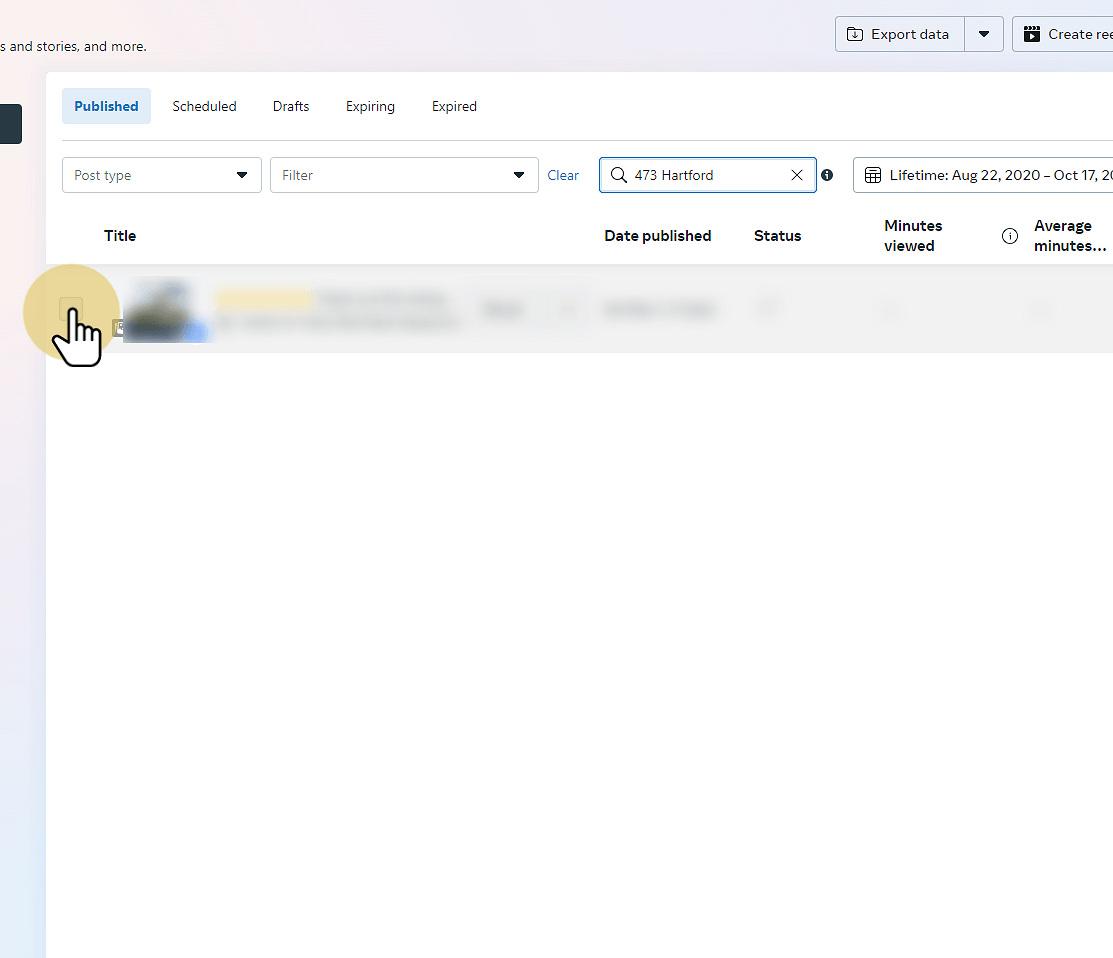
6. Check the boxes
Check the box for all the matching results you wish to remove. Remember to check the date of the posts and only remove the posts that should be removed. If there was a price adjustment or other update to the listing that triggered an updated post, you likely only want to remove the older post and leave the newer one alone.
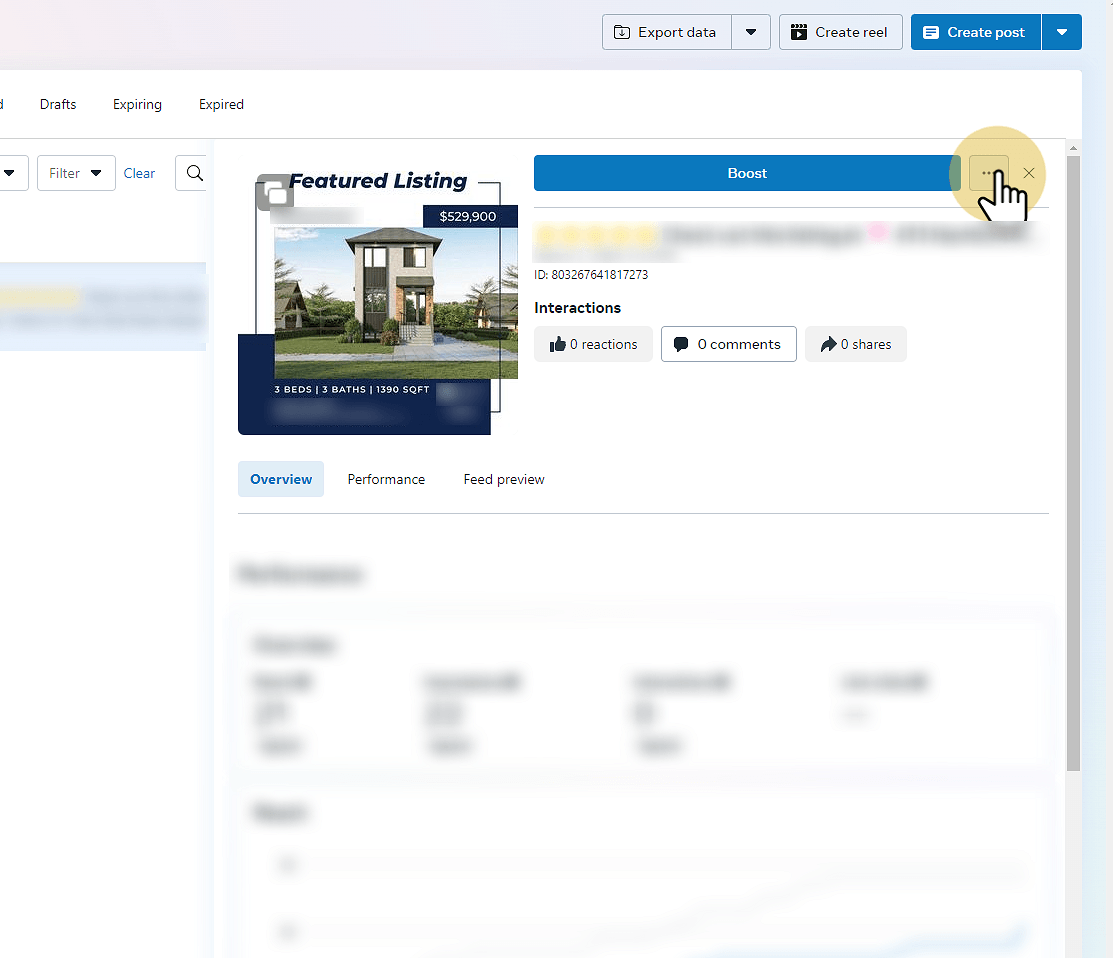
7. Click the 3 dots
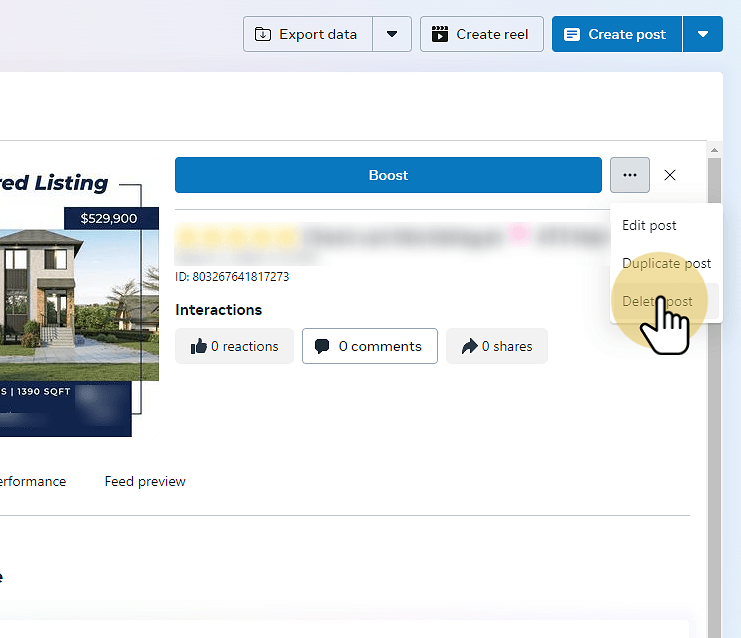
8. Click "Delete post"
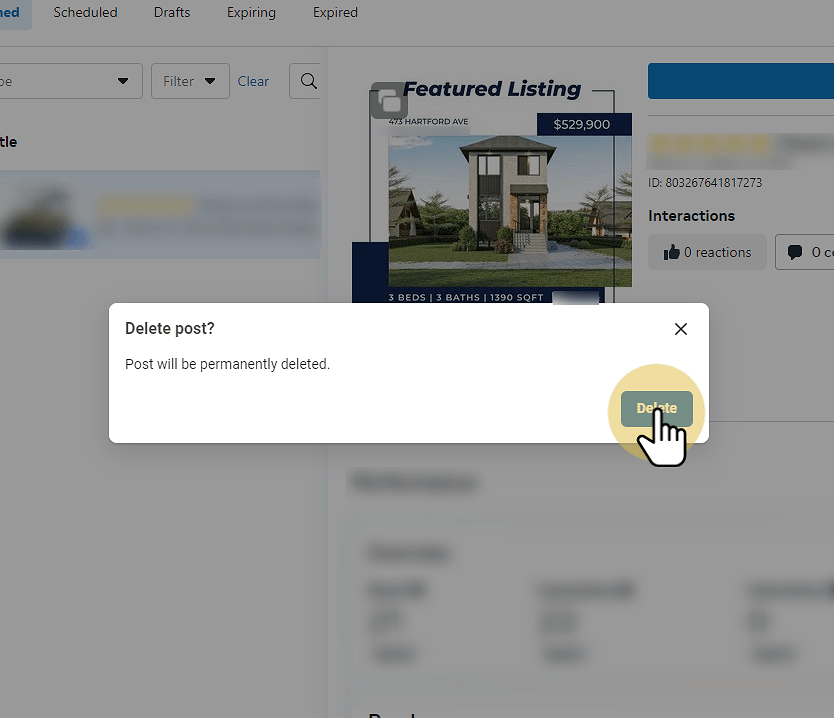
9. Click "Delete"
1. Visit your TikTok profile in Chrome browser
We recommend using the Chrome browser to follow these instructions. These instructions are a bit technical but it's the only way to find specific posts on your TikTok profile to remove them. You can get to your TikTok profile in a few different ways. The easiest is to visit https://www.tiktok.com/@[handle] where you replace [handle] with your custom handle you might have set. Another easy way to get to your profile is to log into TikTok and click on "Profile" from the menu on the left.
2. Scroll to the end of your posts
This is a crucial step! You need to scroll to the end of all the posts on your profile so they all have loaded into the browsers memory in order to search your profile later. On a Windows machine you can just press the End key repeatedly until nothing more loads. On a Mac you can press Cmd + ↓.
3. Open the DevTools tab
Windows press F12 or Ctrl + Shift + J
Mac press Cmd + Opt + J
4. Click "Elements"
Sometimes the DevTools tab will already be in the Elements tab, but if not, be sure to click on "Elements".
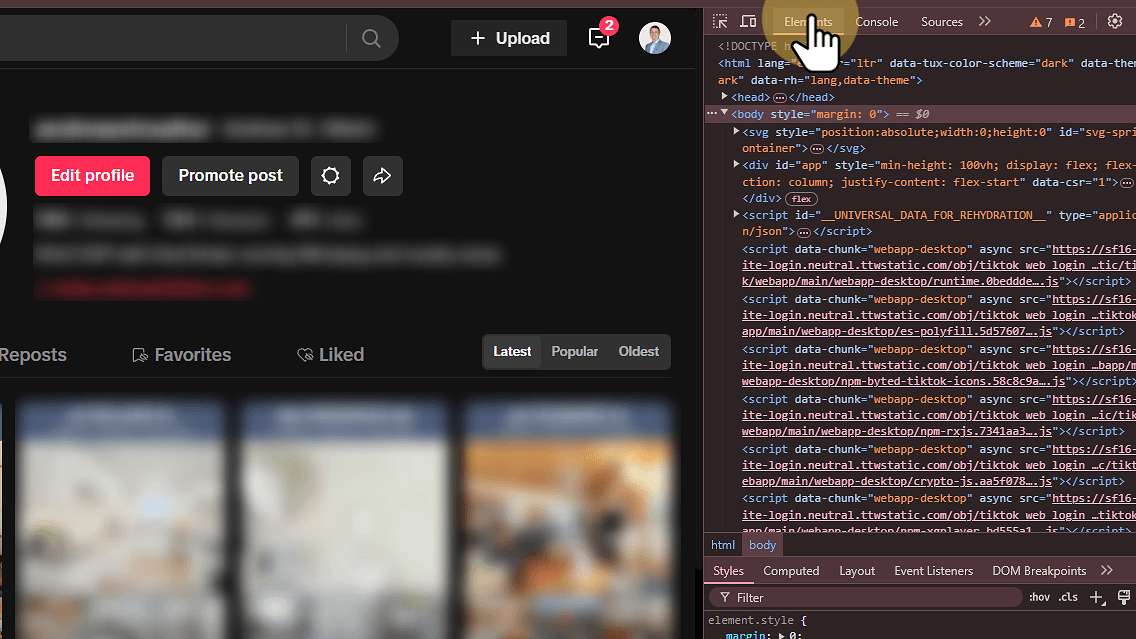
5. Click anywhere in the Elements code
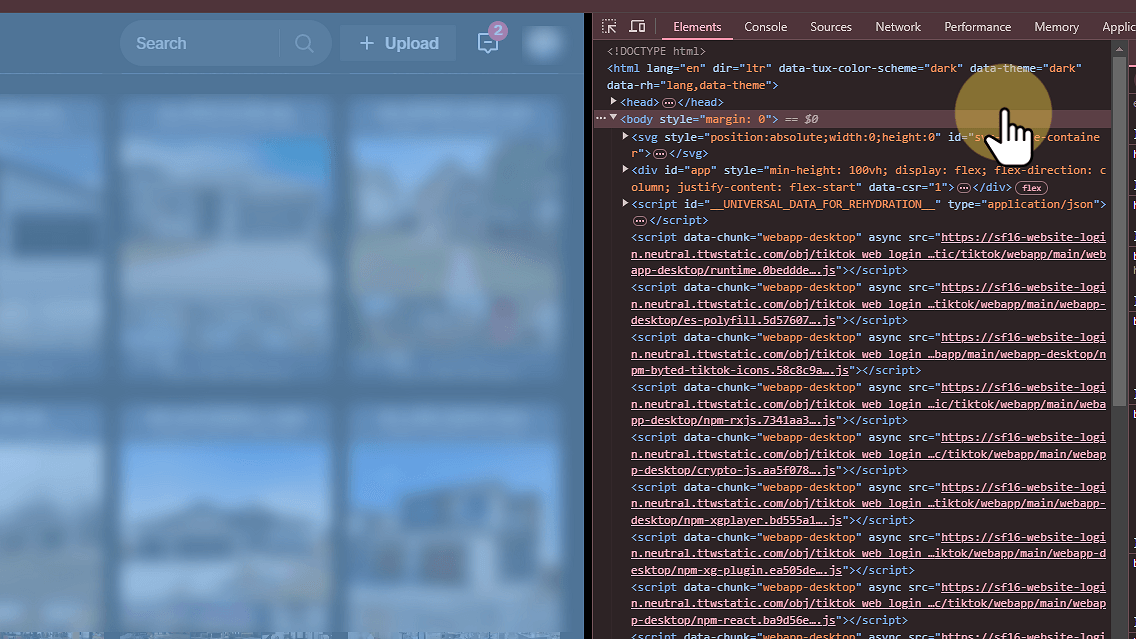
6. Enable search bar
Windows press Ctrl + F
Mac press Cmd + F
7. Click "Find by string, selector, or XPath"
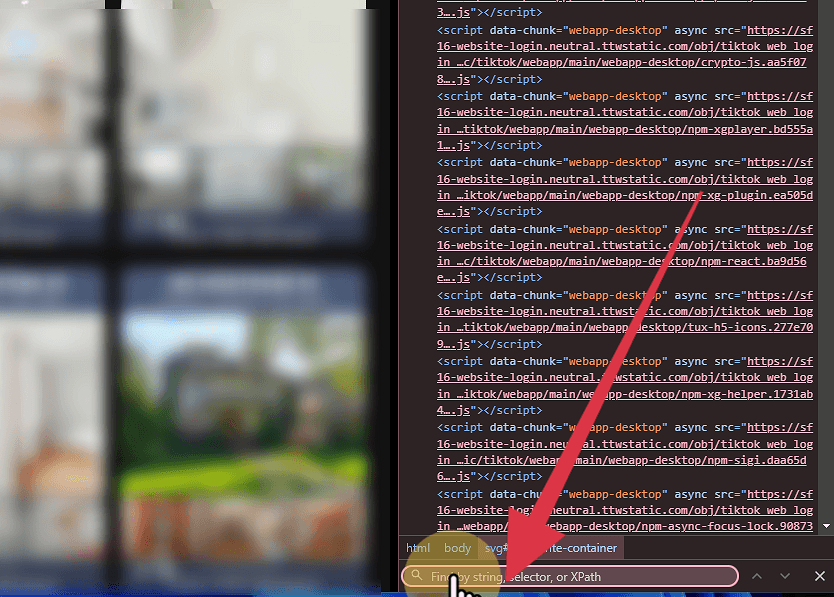
8. Enter the address or MLS number
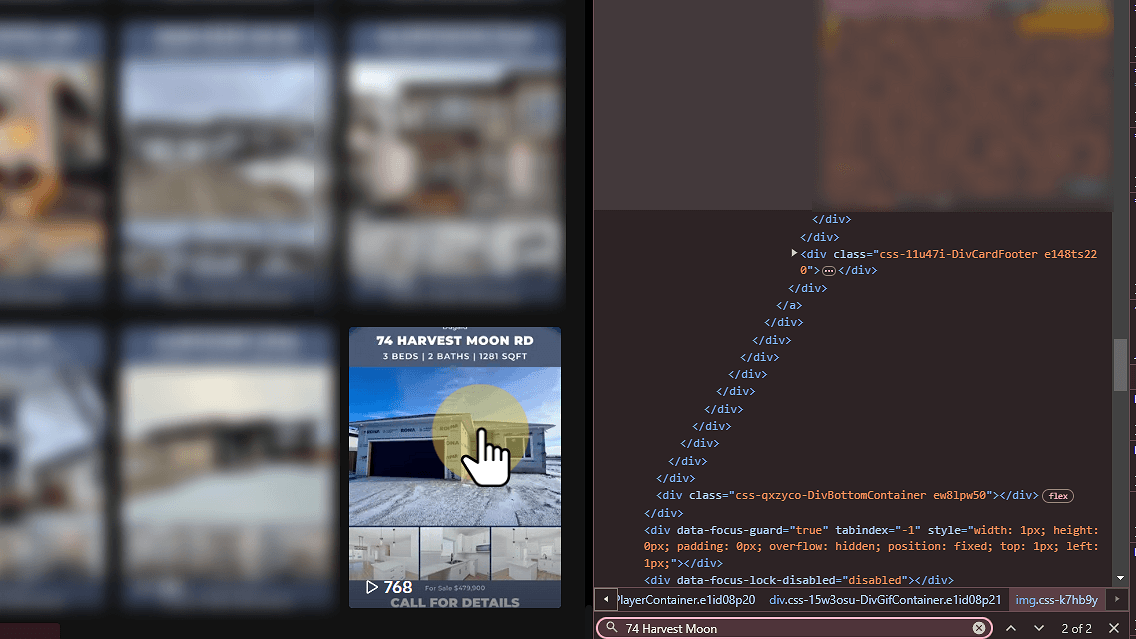
Your posts on TikTok should include either the address or the MLS number. Enter the street number and name only, without the street type or the MLS number. When you do, you should see one of the posts highlighted on the left. If you missed it, go back to the search box, place the cursor at the end of the address you typed in and press Enter.
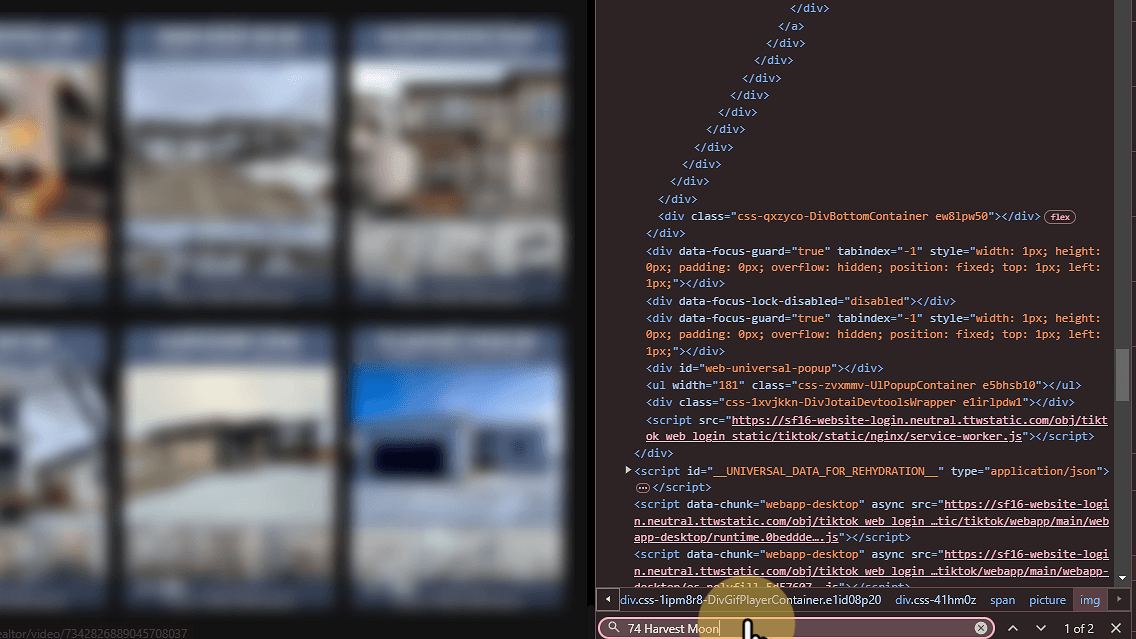
9. Click on the post
Once you see the post that is highlighted or the post you wish to remove, click on it to open it.
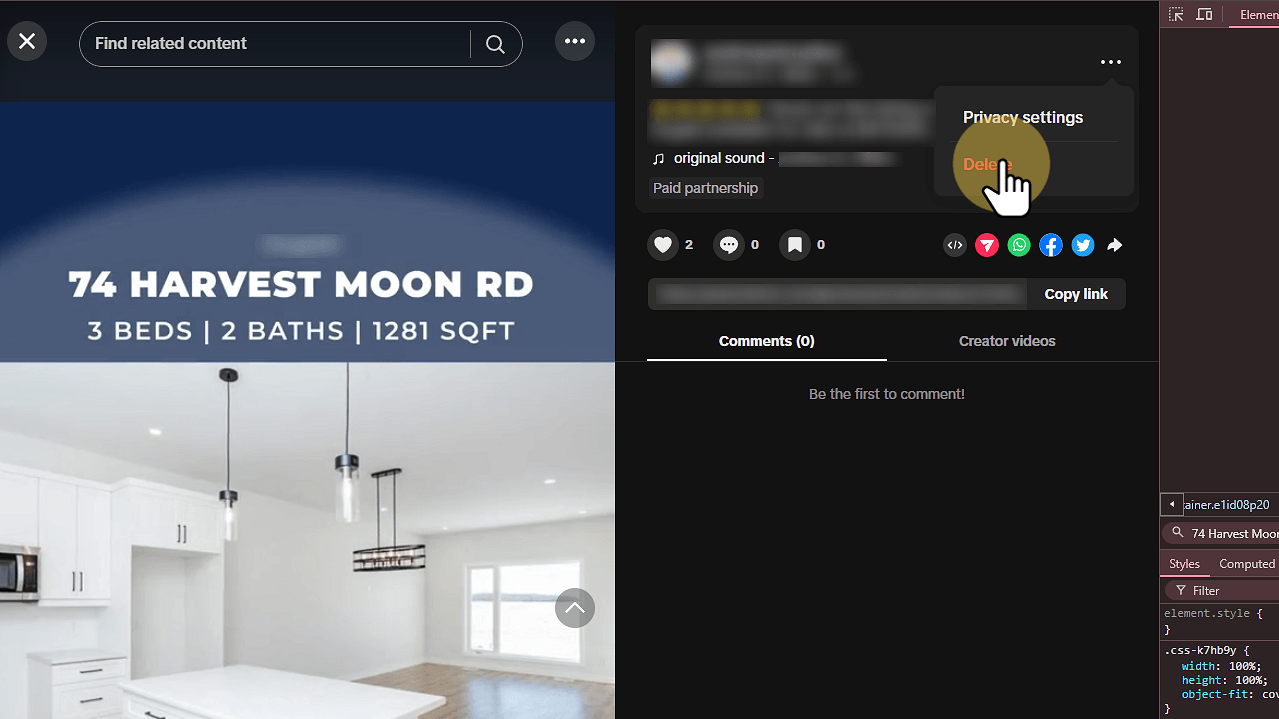
10. Click "Delete"
To see the Delete option, you need to hold your mouse over the 3 dots on the section above your caption and not the 3 dots beside the search box. If you can't see these 3 dots, try closing the DevTools.
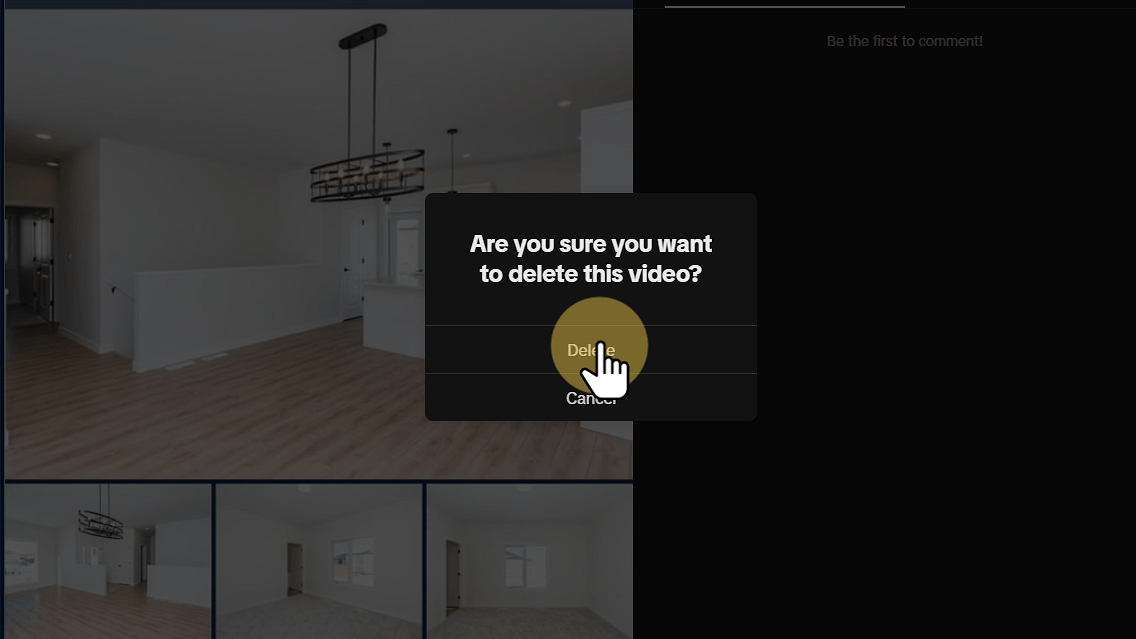
11. Click "Delete"
1. Visit your YouTube channel
You can get to your YouTube channel in a few different ways. The easiest is to visit https://www.youtube.com/@[handle] where you replace [handle] with your custom handle you might have set. Another easy way to get to your channel is to log into your google account and click on your profile icon at the top right corner of the browser and choose "View your channel" just below your channel name near the top.
2. Click "Your videos"

3. Search for the address
Click on the Search bar to search your channel. Enter the address of the property you wish to remove.

4. Click on the property link

5. Click on the 3 dots at the top right

6. Click "Delete"

7. Check this box

8. Click "Delete forever"


Frequently Asked Questions
CREA® has established a Data Distribution Facility (DDF®) to assist its members in sharing MLS® listing content across various websites. This initiative ensures that the MLS® listings presented on these platforms are accurate, current, and appropriately utilize CREA's trademarks.
After you enable the DDF®:
- The Embeddable Website Widget code can be provided within 24 hours.
- Initiating your automation workflow for social posts (without templates) and email notification within 48 hours.
- Working with you to create custom template designs for images and/or videos within 5 business days.
No free trial is available due to the cost of image & video rendering, server & database usage, and access to the DDF®.
Of course you can! Our pricing scales with your company. Chat to our friendly team to find a solution that works for you as you grow. If you change your subscription, it will pro-rate any remaining balance for your subscription and apply this to your new subscription until consumed before charging your payment method going forward.
We understand that things change. You can cancel your subscription at any time and it will become effective at the end of your current billing cycle. We can not offer refunds so we recommend trying a monthly subscription before purchasing an annual subscription.
Yes, you can easily update your billing information by clicking on Billing & Subscriptions found under Resources at the bottom of each page of our website.
Monthly billing is charged once per month. Annual billing is charged once per year. All billing is handled through our online payment partner Stripe.com.
